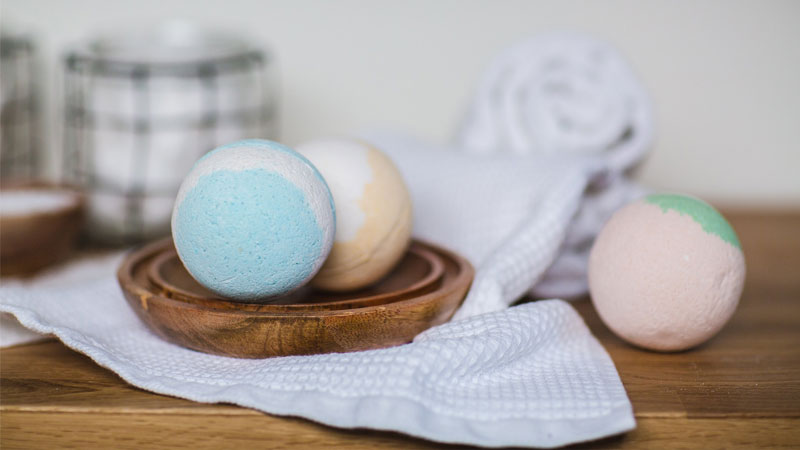
Make your own aromatherapy bath bombs

Love those fizzy bath bombs that look and smell amazing? Why not get creative and make your own beautiful bath fizzies with a few simple ingredients! You can make them in all shapes and sizes, different colours and even add botanicals to produce some truly stunning, homemade bath art! Once you're done, simply pop one into a lovely warm bath, for a sumptuously soothing, spa-like soak!
How to make your own bath bombs
When you make your own bath bombs you can be 100% sure of what you’re putting on your skin. Certain shop bought products can be full of synthetic colours, fragrances and even glittery bits that will actually be doing you (and the environment) more harm than good. Some of the most common ‘synthetic’ ingredients in bath bombs are known endocrine disrupters and are linked to problems such as asthma, eczema, ADHD, cancer and other diseases, as well as urinary tract and vaginal infections.
We've pulled together the basic ingredients and instructions for making your own homemade, ‘healthy’, fizzy bath bombs, however as you get more confident you can become more adventurous in your choice of ingredients - adding in other natural skin nurturing ingredients such as mineral rich salts, cosmetic butters, hydrolats, oats, dried flowers and even milk and honey!
Basic aromatherapy bath bomb ingredients (makes approx 4 medium bombs)
- 2 cups of Sodium Bicarbonate
- 1 cup of Citric Acid
- 1 cup of Corn Flour (Known as Corn Starch outside of UK)
- 18 -36 drops of your favourite essential oils (we typically recommend using no more than 3 different oils per blend).
- 30ml of your chosen carrier oil (e.g. Sweet Almond, Rosehip, Jojoba, Calendula - whatever takes your fancy)
- Spray bottle with water (or hydrolat if you want to add some extra therapeutic properties)
- Latex gloves
- A bath bomb mould or something similar - a chocolate mould, muffin tray or even an ice cube tray will be fine. It's often easier to start off making smaller bath bombs as these are less likely to crumble. Once you've perfected the process then you can progress to larger moulds
- Cosmetic colours / dyes - optional (choose natural colourings to stay kind to the skin).
- Optional: 2 tbsp of dried botanicals (i.e. lavender, rose petals)
Note: We have added Corn Flour to the ingredients list as this acts as a stabiliser and slows the reaction between the Sodium Bicarbonate and Citric Acid, giving a longer lasting 'fizz'. You can make the bombs without this but it will dissolve much quicker.
Step by step instructions for making bath bombs
- Pop on your gloves for protection as the citric acid will sting if it comes into contact broken skin. Measure out the Sodium Bicarbonate and Citric Acid and sieve into a metal or glass bowl. Mix thoroughly with your hands. Avoid getting the powder in your eyes or breathing it in, as it can be irritating.
- Blend the essential oils and carrier oil and mix into the powder. The oils generally don't cause fizzing, but some citrus essential oils can, so mix quickly if this happens.
- If you're adding colour, add it in bit by bit until you have your desired shade. If you want to make multi-coloured bath bombs - separate your mixture into different bowls and add your different colours to each bowl. Mix the colours in quickly, rubbing the mixture between your fingertips - a bit like making a crumble topping!
- Then spray in the water or hydrolat bit by bit, until the mixture starts to hold together when you squeeze it in your hands. Work as quickly as you can now, before the mixture starts to set.
- Pack into your moulds, pressing down firmly.
- If you’re using a sphere-shaped mould slightly overfill each half, then press together firmly (do not twist). Leave for a few minutes, then gently tap to remove one half of the mould. Leave the bath bomb to set in the other half of the mould for around 20 minutes.
- Carefully take the bath bombs out of the moulds and pop them somewhere safe to dry out - ideally somewhere warm and dry.
- Once dry, wrap them in cling film and continue to store in a dry place. Or gift wrap them for friends and family. It's best to use them as quickly as possible as they will fizz more effectively when fresh. It's best to use them as quickly as possible as they will fizz more effectively when fresh. If they are left exposed to the air they will oxidize and won’t fizz.
Essential oil blends for bath bomb bliss
Not sure which essential oils work well together? Here are a few combinations that you might like to try out...
- To de-stress or soothe anxiety try Bergamot, Geranium and Mandarin
- To calm and aid sleep try Lavender, Sweet Orange and Ylang Ylang
- To relieve aches and pains try Black Pepper, Sweet Marjoram and Rosemary
- To lift the mood try Lemon, Lime and Patchouli
The most important thing is to choose the essential oils that you like the smell of - as these will be the ones that will be of most benefit. Your body is clever so be guided by your sense of smell.
Or, for a super easy solution, if you don't want to create your own essential oil blends, why not try one of our pure essential oil blends, expertly blended with a synergistic selection of oils. You can choose from options such as: Relaxing, Uplifting, Sweet Dreams, PMT or Menopause!
Most importantly, have fun creating your beautiful bath bombs and enjoy your well-earned, sizzling soak!
Base Formula


