
Aromatic acupressure facial for health and wellbeing
Acupressure is a healing tradition which originated in China over 5000 years ago. The Chinese found that pressing on selected points on the body, with fingers and thumbs, helped relieved pain in the area and in other areas too and encouraged feelings of physical and psychological wellbeing. I think most of us can relate to this, because many of us will have, at some time or other, rubbed a painful area to try and reduce discomfort. I believe that using aromatherapy oils on acupressure points complements an already lovely self-care treatment and this blog looks at how this can be done simply and effectively with an aromatic acupressure facial.
What is acupressure and how does it work?
In Traditional Chinese Medicine (TCM), meridians are invisible energy pathways, or channels that run through the body. Our vital life energy, known as ‘qi or chi’ flows through these meridians and as long as this energy flows freely, our body will remain healthy. If anything disrupts the balance of this flow or if the flow becomes clogged or blocked it is said to cause illness. Many things can cause an imbalance or blockage including stress, injury, trauma, a poor diet, dietary excesses, or drug/alcohol addiction.
Most acupressure points lie on a meridian in specific places where blockages are common. Stimulating these points can therefore help to unblock or rebalance the flow of energy, and release endorphins and other natural pain-relieving qi to improve physical and emotional health and wellbeing.
Acupressure is generally regarded as safe to do on yourself, when applied correctly and, from a western perspective, is said to work by closing the pain gate and inhibiting the pain signals passing to the brain.
Like aromatherapy, it is a complementary health treatment, in that it does not replace orthodox medical treatment but can be used alongside it to help reduce some of the associated pain and distress caused by disease. It goes without saying that any persistent medical symptoms should be reported to your GP and, if you have any significant medical condition and/or are on medication, please speak with your medical practitioner before trying any of the acupressure techniques below. I also recommend that you avoid using these techniques if pregnant. It may take a few weeks before you notice any real benefit, so you may find it helpful to make a note of the differences you see on a week by week basis, as this can help you track your progress.
How to apply pressure
Before starting, it's important to familiarize yourself with how to apply pressure correctly to the acupressure points. This can be done by simply applying gentle but firm pressure, using one finger or thumb. The idea is to apply enough pressure to ‘feel’ it, but not enough to leave a mark on the skin. Without lifting the thumb or finger, apply slow firm pressure on the point at a 90-degree angle from the surface of the skin and hold for at least 30 seconds to activate the point. Do not pull the skin. Stimulate each point one at a time. Apply the pressure gradually and release it gradually too, as this gives body tissues time to respond. Close your eyes and focus your attention on the acupressure point, imagine that you are breathing healing energy into the area. Inhale deeply into the abdomen, feel it rise, and then exhale, feeling it fall.
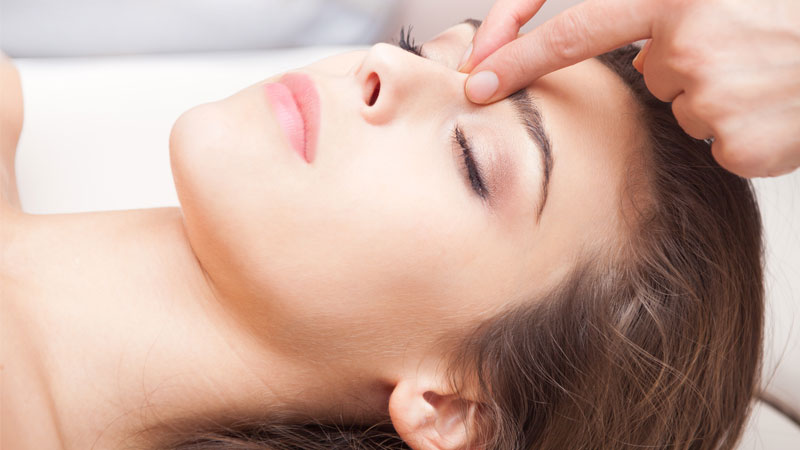
Acupressure Facial
The acupressure points located on the face and head can be used to help with many problems including stress, fatigue, congestion, headaches, allergies, sore eyes, hot flushes, jaw pain, earache, poor concentration and memory. It can also help to relax and tone the facial muscles to improve the condition of the skin.
Before starting your facial make sure you have the following products to hand. If you want to make your own aromatherapy blends to complement the treatment, please look at the suggested recipes provided at the end of this article.
Products required:
- Cleanser
- Toner
- Facial oil
- Moisturiser
- Cotton wool pads
Step 1
Cleanse the skin with your choice of cleanser and remove with cotton pads
Step 2
Apply your chosen toner with cotton pads
Step 3
Apply a few drops of facial oil to your fingertips
Step 4
Commence the acupressure routine using any of the following points. You don't have to use them all, select the ones that are most suitable for your needs.
Acupressure point K27
Location: In the hollow below the collarbone next to the breastbone
Benefits: Relieves allergies, congestion, asthma, and sore throats
Acupressure point St.3
Location: At the bottom of the cheekbone, directly below the pupil
Benefits: Relieves congestion, burning eyes, eye fatigue, toothache
Acupressure point: GV 26
Location: Two-thirds of the way up from the upper lip under the nose
Benefits: Cramps and dizziness, improves memory and concentration
Acupressure point LI20
Location: On either cheek, just outside nostril
Benefits: Relieves nasal congestion, sinus pain, facial swelling
Acupressure point: St 2
Location: One-half inch below the centre of the lower eye ridge in an indentation of the cheek
Benefits: Relieves burning eyes
Acupressure point: B2
Location: In the indentation of the inner eye socket, where the bridge of the nose meets the ridge of the eyebrows
Benefits: Relieves pain in general, relieves hay fever, hangovers, head congestion
Acupressure point: GV 24.5
Location: Directly between the eyebrows, in the indentation where the bridge of the nose meets the centre of the forehead
Benefits: Relieves head congestion, stuffy nose, and headaches, aids chronic fatigue, irritability, indigestion, balances the pituitary gland, relieves nervousness, insomnia, good for spiritual and emotional imbalances, good for improving concentration
Acupressure point: St 6
Location: Between the upper jaw and lower jaw, on the masseter muscle
Benefits: Relieves jaw pain, TMJ problems, toothache
Acupressure point: SI 19, TW 21, GB2
Location: SI19 is directly in front of the ear hole in a depression that enlarges when the mouth is open. TW21 is one-half inch above this point, GB2 is one-half inch below SI19
Benefits; Relieves jaw pain, TMP problems, toothache
Acupressure point: TW 17
Location: In the indentation behind the ear
Benefits: Relieves hiccups, ear pain, jaw pain
Acupressure point: GV 19, GV 20, GV 21
Placing the left fingers behind the left ear, the right fingers behind the right ear. Move the fingertips up to the top of the head, then feel for the hollow (GV 20). GV 19 is also in a hollow, one inch behind GV20. GV21 is one inch in front of GV 20.
Benefits: Relieves depression, headaches and improves memory. GV20 also helps improve mental concentration and relieves hot flushes
Acupressure point: GB 20
Location: Below the base of the skull, in the hollows two or three inches apart depending on head size
Benefits: Relieves hot flushes, stiff neck, neck pain, jaw pain, headaches, irritability, and poor memory.
Acupressure point: GV 16
Location in the lower centre of the back of the head in a large hollow under the base of the skull
Benefits: Relieves headaches and stiff necks
Acupressure point: B10
Location: One-half inch below the base of the skull on the muscles one-half inch outward from the spine
Benefits: Relieve stress, burnout, exhaustion, stiff necks
Step 5
- Using the forefinger and thumb, gently rub the jawline moving outwards from the chin
- Using the index fingers massage the chin for approximately ten seconds
- Using the fingertips, gently but firmly massage the cheeks in a circular motion for about twenty seconds
- Using the tips of your fingers, tap underneath the eyes, moving in an outward direction
- Using fingertips and thumbs, move upwards, massage along both eyebrows moving in an outward direction
- Finish by gently massaging the hairline, scalp, and all over the head.
Step 6
Apply more toner
Step 7
Apply moisturiser
Suggested aromatherapy blends
Dry skin
- To cleanse and moisturise use 10ml of base cleanser and moisturiser and add 1 drop Rose Otto and 1 drop Geranium to each product
- Tone with Chamomile Hydrolat
- For a facial oil mix 1 drop Rose and 1 drop Geranium with 10ml Peach Kernel oil
Oily skin
- Mix the cleanser and moisturiser as per the above directions, adding 1 drop Bergamot and 1 drop Sandalwood
- Tone with Witch Hazel or Orange Flower Hydrolat
- Mix a facial oil with 10ml Jojoba, 1 drop Bergamot and 1 drop Sandalwood
Sensitive skin
- Mix the cleanser and moisturiser as per the above directions, adding 2 drops of Neroli essential oil
- Tone with Rose Otto Hydrolat
- Mix a facial oil with 10ml Rosehip Seed oil and 2 drops Neroli
Christine Fisk
Consultant Aromatherapist
Read other articles by Christine Fisk


